When the light comes from the wrong direction
In many situations – especially outdoors – we have no opportunity to change the direction of the available main light. In strong light conditions in particular, this can result in sharply defined, disturbing shadows on the side of the subject opposite the illumination. We can avoid this by using a reflector or a flash unit.
The built-in flash mounted on the camera is, in most cases, insufficient to produce a truly well-lit image. Although its use is often unavoidable, it is worth considering the given shooting situation and deciding whether it is truly necessary or whether the problem can be solved without it.
There is, however, one case where it is certainly useful: when we cannot modify the direction of the existing light. Sunlight is a typical example: it may provide perfect illumination on one side, while creating harsh, detail-less shadows on the other, as the difference in illumination between the two sides exceeds the sensitivity range of the image sensor or film.
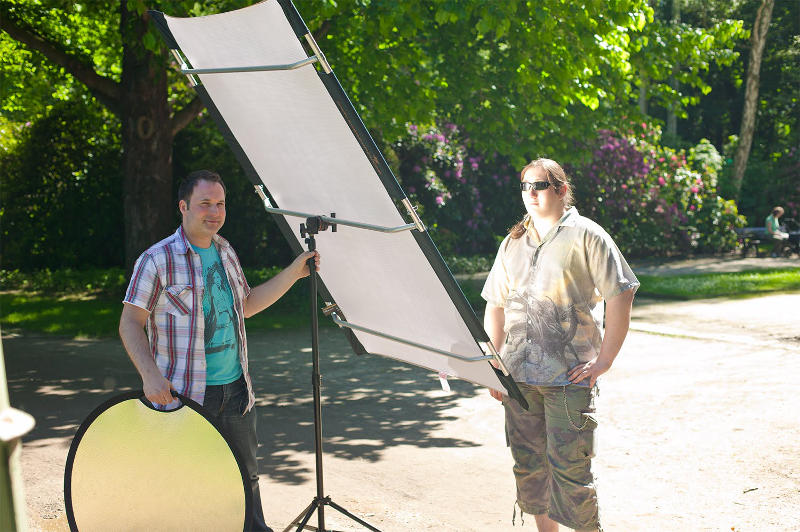
Instead of flash, we may also use reflectors. Outdoors, these tools can become real stars, as they require no power supply, can be positioned freely, and their large surface area produces soft, diffused light.
Flash Units
Built-in flash
Almost all modern cameras are equipped with one, except for the professional flagship models of manufacturers. Their disadvantage is low output, which limits effective use to short distances. These flashes draw power from the camera battery, which can drain quickly, especially in cold weather. Another difficulty is that the direction of light cannot be altered; they are suitable only for direct flash, which may result in red-eye. This is intensified by the proximity of the flash to the optical axis of the lens.
When used as fill flash in natural light, however, this characteristic can be advantageous, as it produces minimal additional shadow.
Fixed reflector flash
This type is generally a medium-powered, compact device. Compared to the built-in flash, it fires farther from the optical axis, making it less prone to red-eye. It usually offers higher output and more features, and in some cases its recycling time is even faster than that of larger system flashes. It uses its own power source, allowing for more exposures. However, it is not suitable for indirect flash. Its small size and weight make it practical for outdoor fill flash applications.
Swivel-tilt head system flash
This type provides the photographer with the greatest versatility and the highest light output. Its power and adjustable head make indirect flash possible, enabling a wide range of lighting solutions for both indoor and outdoor work.
The reflector built into the flash head was formerly adjusted manually; in more recent devices it is motorized and automatically set according to the focal length of the lens. System flashes are generally expensive and have the highest power consumption. Their size and weight are also considerable.
Macro flash
A ring-shaped flash that surrounds the front element of the lens during use, producing shadow-free lighting in macro photography. Modern professional types contain several individually switchable flash tubes, allowing for varied shadow effects. In portrait or fashion photography, this feature can also be exploited, and the ring-shaped reflection in the subject’s eyes creates an interesting visual effect.

The red-eye effect
The internal flash of a camera is positioned relatively close to the optical axis of the lens. This may cause the subject’s eyes to appear red in the image if, with dilated pupils, the flash light reflects from the blood vessels of the retina.
The risk of red-eye can be reduced by using an external flash positioned farther from the optical axis, by indirect flash, or by using a flash diffuser that produces scattered light. Another option is the camera’s red-eye reduction mode. This works by emitting several pre-flashes before exposure, causing the pupil to contract and thereby reducing the likelihood of reflection from the retina.
Automatic flash mode
In this mode, the camera and/or the external flash computer determines when and to what extent flash is required. Typical cases include insufficient light for metering, situations where a long shutter speed would cause motion blur, or strong backlighting, when without flash only a dark silhouette of the foreground subject would be visible.
Flash-on mode
In this case, the flash fires with every exposure, regardless of exposure settings. With adequate ambient light, it can be used as fill flash to balance excessive contrast differences—for example, to lighten strong shadows under the nose and chin in portraits taken in midday sunlight.
Flash exposure compensation
When using flash-on mode, the flash output may be excessive or insufficient relative to ambient light. Excessive flash overexposes (burns out) the foreground, removing detail, while insufficient flash fails to provide proper fill, leaving the foreground underexposed despite the flash. Flash exposure compensation addresses this problem, ensuring that both background and subject are properly exposed. Achieving optimal results may require several test shots with different compensation settings.
Accessories
For fill flash, it is advisable to use an attachment mounted on the flash to produce more even light. These are available in both direct and indirect versions. The former diffuses the flash light (diffuser), while the latter reflects the upward- or backward-directed flash light onto the subject.
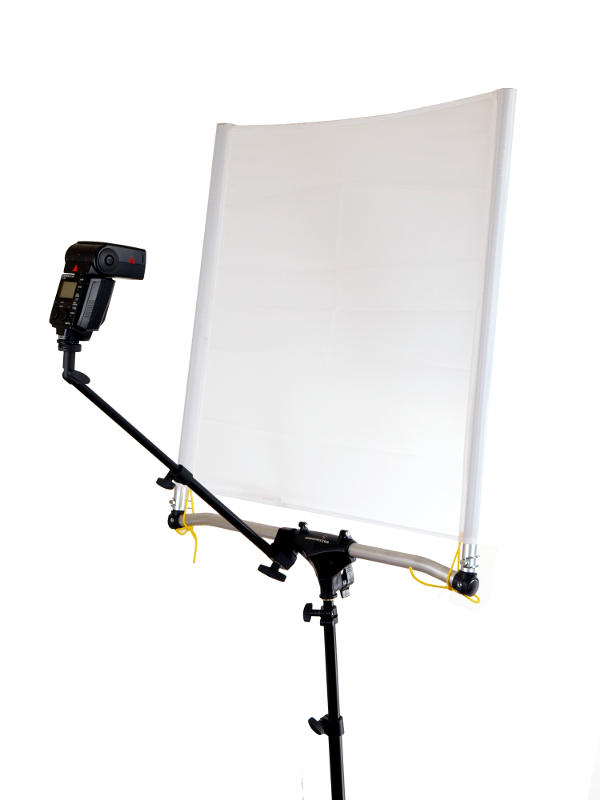
Reflectors
Instead of flash, we may use light-reflecting surfaces, known as reflectors. They are available in various designs, sizes, and shapes. They can produce far more pleasing lighting than flash, since their surface area is many times larger than the light-emitting surface of a flash, thus scattering the incident light according to the surface design.
Reflectors are typically foldable, compact, lightweight, and easily transportable. They require no power supply.
They are among the most practical accessories in photography. They are versatile, available in many sizes, constructions, and colors, easy to transport, and simple to position and adjust. Glossy and matte surfaces are available.
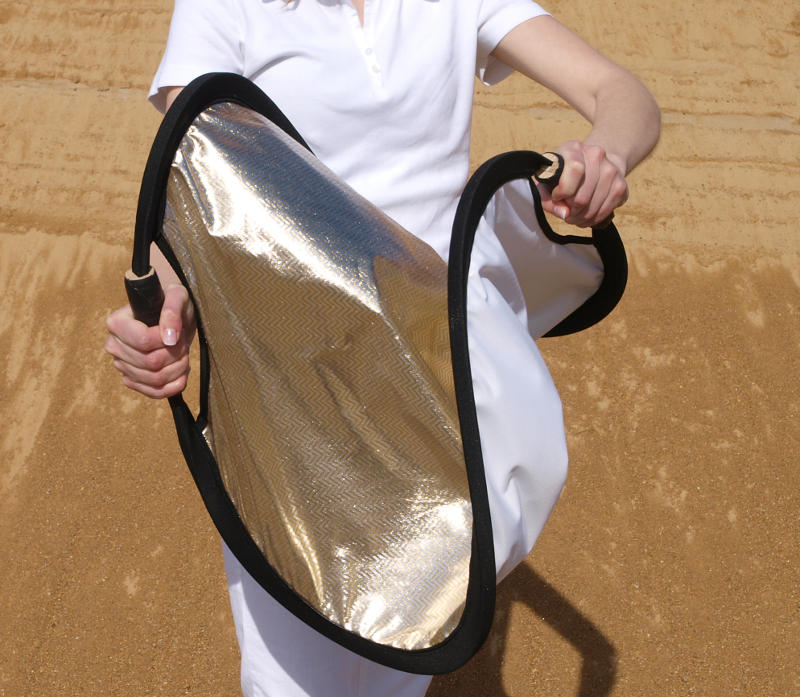
A glossy surface produces stronger, more defined light, making it particularly useful in shade. Silver reflects the most light; often even blue sky provides sufficient illumination, though its color cast may need correction with a yellow filter or with a daylight-surface reflector combining silver with yellow. Such reflectors are especially useful in portrait photography, as they create warmer skin tones.
Matte surfaces reflect less light. Grey, for example, is barely visible to the naked eye and requires practice to use effectively. Matte white reflects more light, while matte silver is similar to glossy silver but with reduced intensity, often making it the preferable choice.
Gold reflectors are also common. They alter the color of light and require practice for accurate color reproduction. They are well suited to summer fashion photography, as they produce a bronzed skin tone, although they also affect clothing colors. This yellow cast can be corrected by slight overexposure.
Reflectors are inexpensive and highly versatile, making them suitable for amateurs as well. Their effect can be tested at home using white cardboard or aluminum foil.
The lighting of the final image depends on the surface of the reflector used, so careful consideration is required when choosing for a specific task. For amateur purposes, one or two 25×50 cm and one 75×125 cm oval reflectors with dual-colored sides (white/gold, silver/gold) are recommended. In some cases, the cover can be reversed to reveal two additional reflective surfaces. With such reflectors, the color of reflected light can be modified as desired. Reflectors may also be combined with fill flash.
Photographing a face
Position the sun behind the model so that it highlights the hair (hair light). Use a reflector placed below the face to soften shadows under the chin and those cast by the hair. By moving the reflector, shadows can be precisely adjusted. The backlight–reflector combination also yields good results in macro photography, as shadows are visible during setup and can be modified by repositioning the reflector.
Photographing larger objects, portraits or full-length figures
Place a reflector opposite the backlit subject, scaled to the size of the object, to serve as the main light. Use a smaller reflector from the side to illuminate remaining shadow areas. By altering surface size and placement, lighting can be freely controlled.
When the subject is entirely in shade
A large silver reflector can create direct illumination while preserving the diffused light provided by shade, resulting in fully plastic, well-modeled lighting.
Gábor Steiner